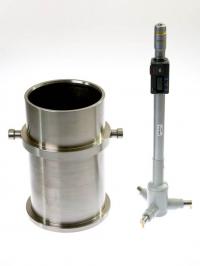
“Surely the size of the gap between and end plate and the mold wall can’t matter when it comes to producing consistent specimens” one might think. But you might want to reconsider.
Monitor your mold and end plate wear and strive to keep all your mold assemblies consistent in size to produce consistent specimens.
AASHTO T312 Section 4.2 New molds shall be manufactured to have an inside diameter of 149.90 to 150.00 mm. The inside diameter of in-service molds shall not exceed 150.2 mm.
AASHTO T312 Section 4.3 All ram and end plate faces (the sides presented to the specimen) … shall have a diameter of 149.50 to 149.75 mm.
The AASHTO specification allows for a minimum clearance between the edge of an end plate and the mold surface of 0.15 mm and a maximum clearance of 0.70 mm.
Comparing a specimen produced in a mold assembly with the minimum allowable clearance to a specimen made in a mold assembly with the maximum allowable clearance, one could expect to see a difference in bulk specific gravity of 0.020 per millimeter of difference.


